Simplify Sharing: Learn To Create A Simple QR Code Web App
QR codes have found their way into virtually every aspect of modern life. From marketing and advertising to ticketing, payments, and inventory management, QR codes offer a versatile solution for streamlining processes and enhancing user experiences.
QR codes gained popularity due to their ability to store large amounts of data in a small square grid of black and white pixels. Unlike traditional barcodes, which can only store limited numeric or alphanumeric characters, QR codes can encode various types of data, including URLs, text, contact information, and even Wi-Fi network credentials.
In this tutorial, we are going to look at some steps for creating a QR code generator using HTML and JavaScript.
Prerequisites
Before we get started, make sure you have a basic understanding of HTML, CSS, and JavaScript.
- Basic Understanding of HTML, CSS, and JavaScript: Familiarity with the fundamental concepts of HTML for structuring web pages, CSS for styling, and JavaScript for adding interactivity is essential. This tutorial assumes a basic knowledge of these languages.
- Web Browser: Use a modern web browser like Google Chrome, Mozilla Firefox, or Microsoft Edge.
For the purpose of this tutorial, you can download the source files for the web app to help you follow along:
Note: As you test the source files, ensure that you load them with in a suitable environment such that all the files are loaded. For offline use, we recommend that you use Live Server and vscode to load the files. Simply open the files in Vscode and run “index.html” using Live Server.
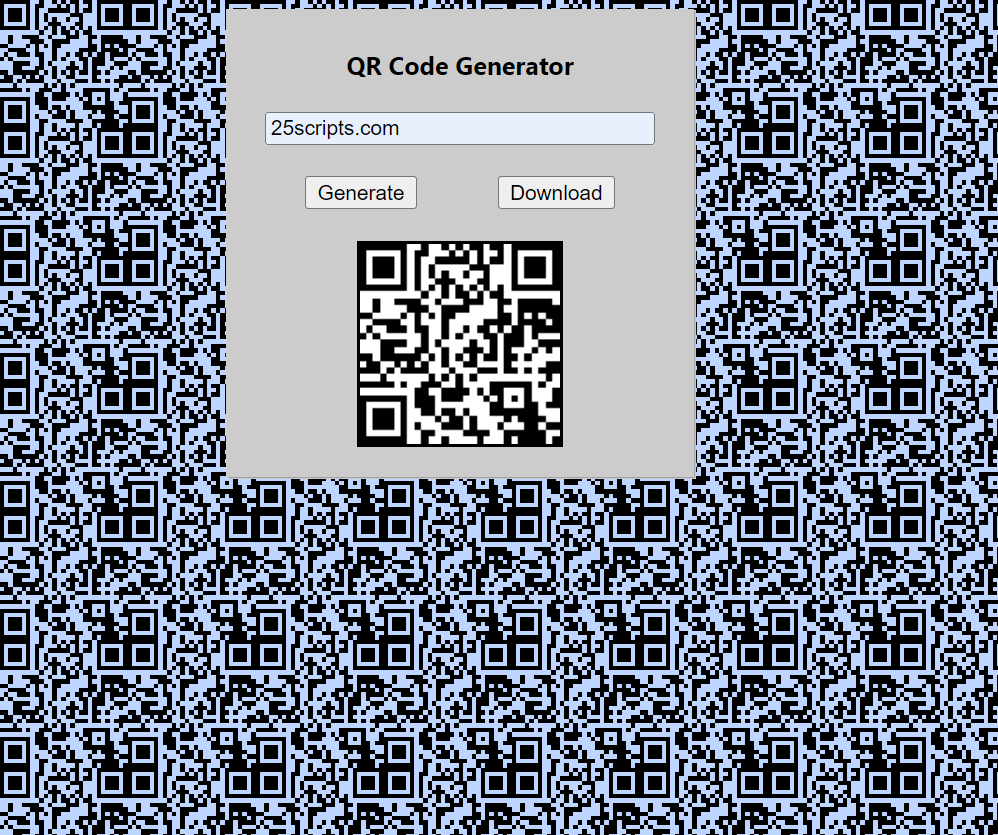
Demo
Here is what we are going to create. Using our QR Code Generator app is simple:
- Enter the desired data (e.g., website URL, text, contact information) into the input field.
- Click on the “Generate” button to instantly create your QR code.
- Optionally, download the generated QR code for offline use or sharing.
Setting up the App
Let’s start by setting up the basic structure of our app. Create an html file called “index.html”, with a basic html web format, and add the basic layout of the qr code app and buttons for using the app.
Also add some tags for the css in the header (link tag) , and a script tag for our JavaScript code. This will also include a JavaScript library (qrcode.min.js) to help in generating the codes.
<!DOCTYPE html>
<html lang="en">
<head>
    <meta charset="UTF-8">
    <meta name="viewport" content="width=device-width, initial-scale=1.0">
    <link rel="stylesheet" type="text/css" href="web.css">
    <title>QR CODE GENERATOR</title>
</head>
<body>
    <div class="main">
<span class="qr_form">
        <span class="qr_heading">QR Code Generator</span>
        <input type="text" id="qr_data" placeholder="Type something.e.g 25scripts.com"></input>
        <span class="qr_actions">
        <button onclick="generate_qrcode();" >Generate</button>
        <button onclick="download_qrcode();" >Download</button>
        </span>
        <span class="qr_image">
            <div id="qr_code"></div>
        </span>
        <a id="download_link"></a>
</span>

    </div>

    <script type="text/javascript" src="qrcode.min.js"></script>
    <script type="text/javascript" src="app.js"></script>
</body>
</html>
Now create a css file called “web.css”, to add some basic css style as shown below.
.main{
    width: 100%;
    display: flex;
    flex-direction: row;
    justify-content: center;
    flex-wrap: nowrap;
}

.qr_form{
width: 100%;
max-width: 250px;
min-height: 250px;
max-height: 250px;
background: #ccc;
display: flex;
flex-direction: column;
justify-content:top;
padding: 25px;
gap: 20px;
box-shadow: 1px 1px 1px #999;
}
.qr_heading{
    width: 100%;
    text-align: center;
    color: #000;
    font-family: 'Segoe UI', Tahoma, Geneva, Verdana, sans-serif;
    font-weight: bold;
}
.qr_form>.qr_actions{
display: flex;
flex-direction: row;
flex-wrap: nowrap;
justify-content: space-around;
width: 100%;
}
.qr_form>.qr_actions>button{
    cursor: pointer;
}
.qr_image{
    display: flex;
    flex-direction: row;
    flex-wrap: nowrap;
    justify-content: center;
}
.qr_image>div{
    min-width: 128px;
    min-height: 128px;
    background-size: 100% 100%;
    background-color: #eee;
    border: 2px solid #000;
}
JavaScript Code
Now, lets look into the JavaScript for the app.
Step 1: Lets create a constant object store the app settings
The code below initializes settings for the app. It includes properties like init for initialization status, width and height for dimensions, colorDark and colorLight for colors, and qr_code to store qrcode object.
//lets store the settings of the app
const qr_settings={
    init:false,
    width:128,
    height:128,
    colorDark : "#000000",
    colorLight : "#ffffff",
    qr_code:null
}
Step 2: Lets create a function to generate the QR code
The function below generates the QR code when the “Generate” button is clicked. The function retrieves input data for the QR code from an HTML input element with the id “qr_data”. It then checks if the QR code generation needs initialization. If it does, it sets up the QR code element’s size and creates a new QR code object with the provided data and settings using the QR Code library.
It updates the qr_settings object to store the QR code object and marks initialization as complete. If the QR code object already exists, it clears the existing QR code and regenerates it with the updated data. Overall, this function dynamically generates or updates a QR code based on user input. Once the QR code is generated and ready, it is then displayed and downloadable.
//function to generate qrcode
function generate_qrcode(){
        //lets get the data for the qrcode
        var input_element=document.getElementById("qr_data");
        var data=input_element.value;
        //lets create qrcode object using the qrcode library
        if(qr_settings.init==false){
        var qr_element=document.getElementById("qr_code");
        qr_element.style="width:"+qr_settings.width+";"+"height:"+qr_settings.height+";";
        var qrcode = new QRCode(qr_element, {
                text: data,
                width: qr_settings.width,
                height: qr_settings.height,
                colorDark : qr_settings.colorDark,
                colorLight : qr_settings.colorLight,
                correctLevel : QRCode.CorrectLevel.H
            });
            qr_settings.qr_code=qrcode;
            qr_settings.init=true;

        }
        //if the qrcode object exits lets clear it and regenerate the code
        else if(qr_settings.qr_code!=null){
                    qr_settings.qr_code.clear();
                    qr_settings.qr_code.makeCode(data);

        }
  }
Step 3: Lets create a function to download the QR code
The function below downloads the QR code as image when the “Download” button is clicked. The function retrieves the QR code image element from the DOM, checks for its existence, and ensures there is only one image. It then creates a canvas element, draws the image onto it, and converts the canvas content to a PNG data URL.
Finally, it creates a download link with the PNG data URL, sets the filename, and programmatically triggers a click event on the link to initiate the download of the QR code image.
function download_qrcode(){
    //lets the image generated by the qrcode library
    var qr_element=document.getElementById("qr_code");
    var img=qr_element.querySelectorAll("img");

    if(img!=null){
        if(img.length==1){

            image=img[0];
            //lets access the image data of the qrcode and create a download link
            var canvas = document.createElement('canvas');
            var ctx = canvas.getContext('2d');

            // Set canvas dimensions to match the image dimensions
            canvas.width = image.width;
            canvas.height = image.height;

            // Draw the image onto the canvas
            ctx.drawImage(image, 0, 0);

            // Convert the canvas content to a data URL
            var dataURL = canvas.toDataURL('image/png');

            // Create a link element
            var link = document.getElementById("download_link")
            link.href = dataURL;
            link.download = 'image.png';
            link.click();
        }

    }
}
Conclusion
Congratulations! You’ve successfully built a simple QR code generator using HTML, CSS, and JavaScript. Feel free to customize it further by adding more features or enhancing the design to suit your needs. Happy coding!