Creating Your First Microsoft Word Addin Using JavaScript
Microsoft Word is used by over 1.2 Billion users worldwide. With this huge market to serve, Microsoft is constantly doing research and testing to improve its software and user experience. This is likely why Microsoft introduced custom add-ins which can be made by any developer to improve software features and user experience. To support developers, Microsoft also published a documentation and API reference on how to create add-ins for Office products which you can access from this link.
Microsoft Office add-ins are powerful tools that extend the functionality of Office applications such as Word, Excel, and PowerPoint. Whether it’s streamlining data analysis, enhancing document collaboration, or automating repetitive tasks, these add-ins empower users to customize their Office experience to suit their unique needs, ultimately boosting efficiency and effectiveness in their work.
The addins can be developed using different languages such as C#, VB.Net, C++, and JavaScript with HTML and CSS. In this article, we are going to focus on how you can create your first Word Addin using JavaScript.
Prerequisites
Before we get started, here are some prerequisites you should have to better understand this tutorial:
- Basic Understanding of HTML, CSS, and JavaScript: Familiarity with the fundamental concepts of HTML for structuring web pages, CSS for styling, and JavaScript for adding interactivity is essential. This tutorial assumes a basic knowledge of these languages.
- Node Js: You should have Node Js installed. You can download it from the official website.
- Microsoft Word Product: You should have access to either an online or offline Microsoft Word Product. You can visit the official Microsoft Word page for more info.
Note: As you test the source files, ensure that you load them within a suitable environment such that all the files are loaded. We recommend that you use vscode to load the files.
Demo
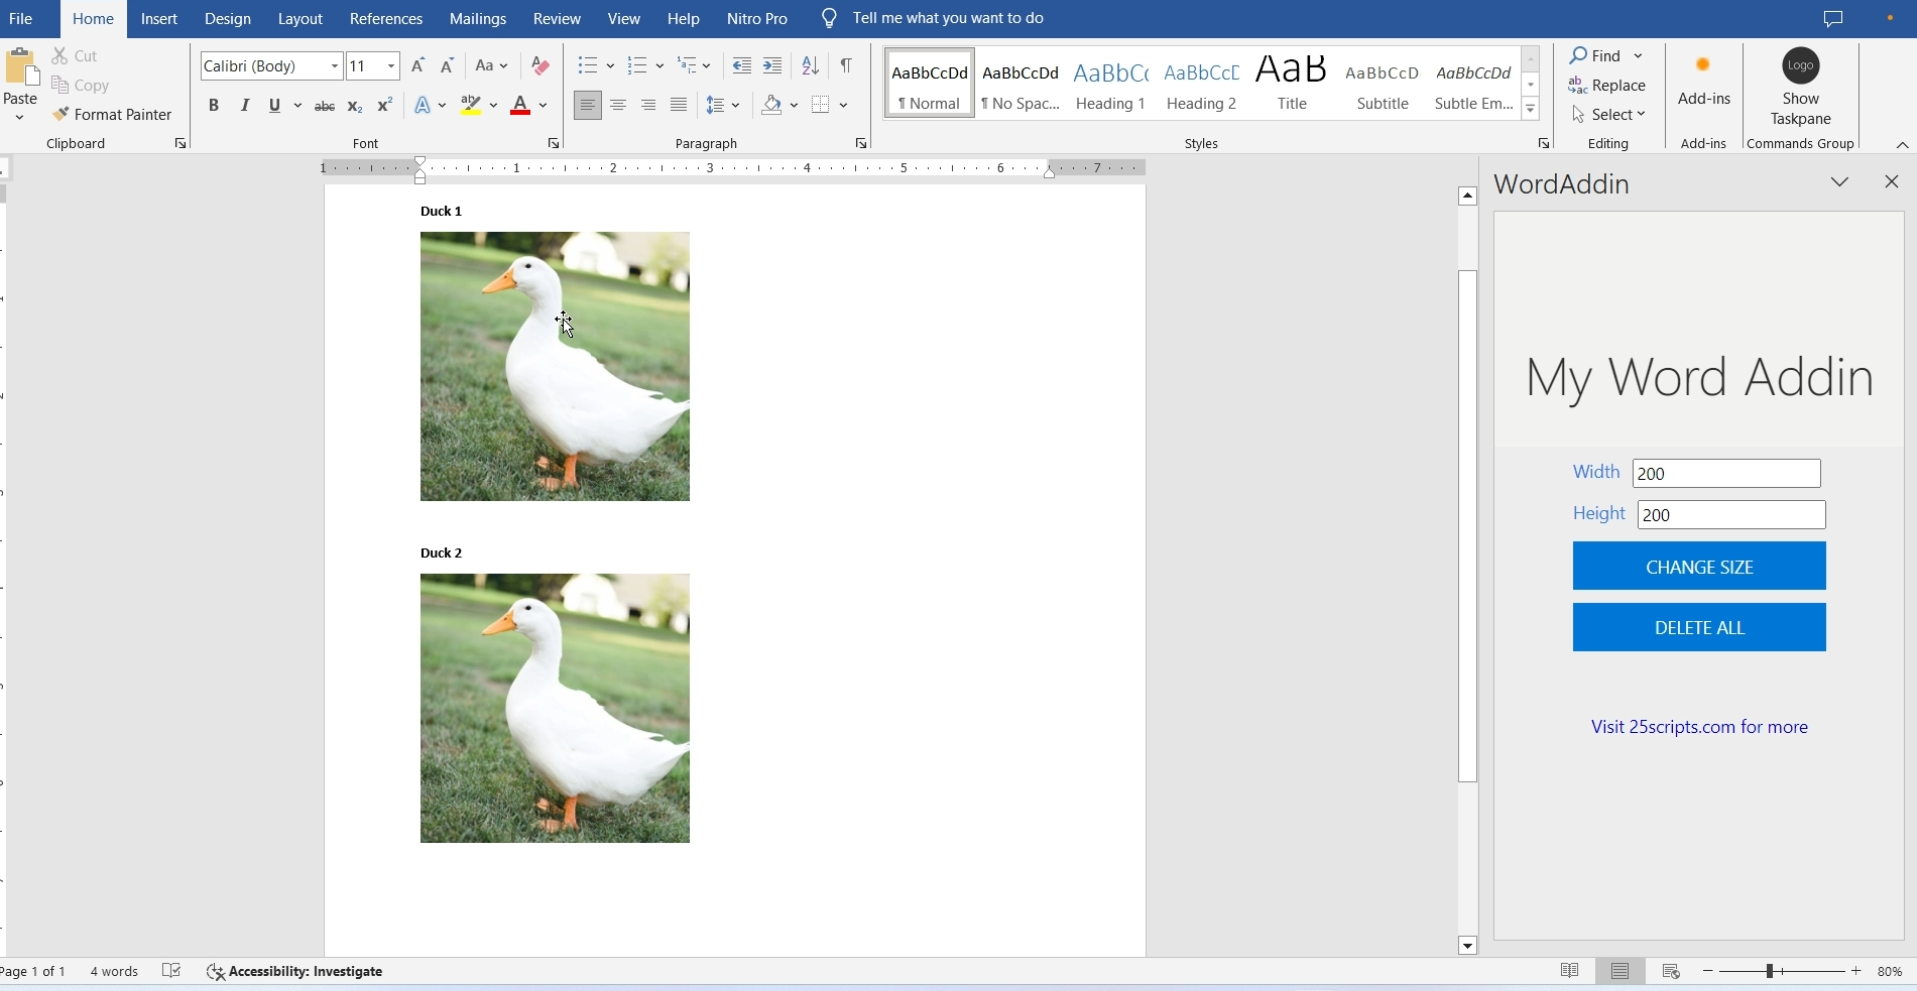
Here is what we are going to create. We are going to create a simple add-in to select images in a Word document and change their size. We shall also add an option to delete the images.
Step 1: Setting Up Your Development Environment
First things first, let’s set up your development environment. You’ll need Visual Studio, Node.js, and the Yeoman generator for Office Add-ins. Here’s how to get started:
- Install Visual Studio if you haven’t already.
- Install Node.js from the official website.
- Open a command prompt and install the Yeoman generator by running:
npm install -g yo generator-officeStep 2: Creating Your Project
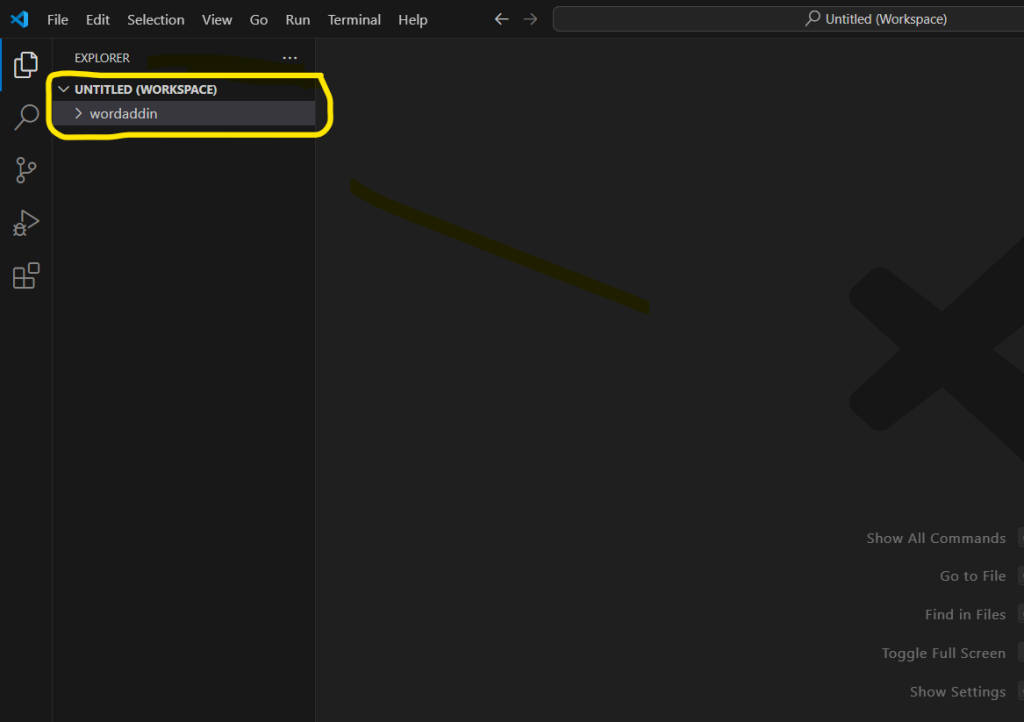
Now that your environment is set up, let’s create a project folder and add it to your vscode workspace as shown below:
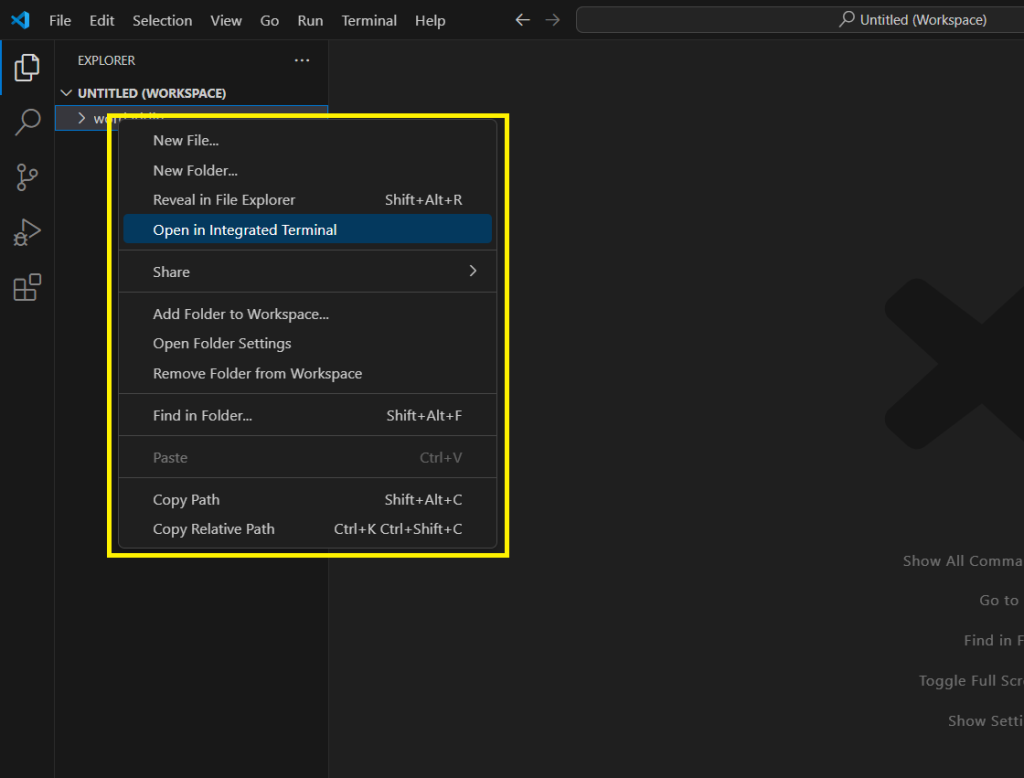
Right-click, and select “Open in integrated terminal” as shown below.
Now run the command below in the terminal:
yo officeUsing the Wizard, select your project type as “Office Addin Taskpane Project”
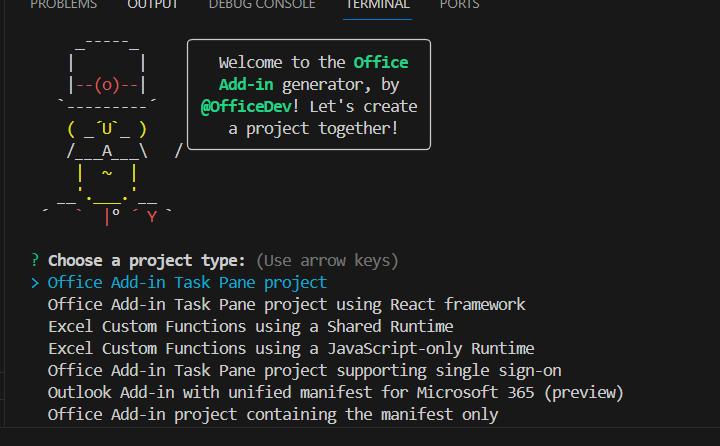
Select the scripting language as JavaScript.
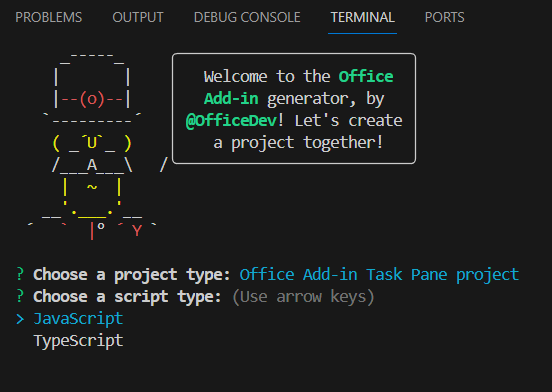
Now type the name of your Word Addin:
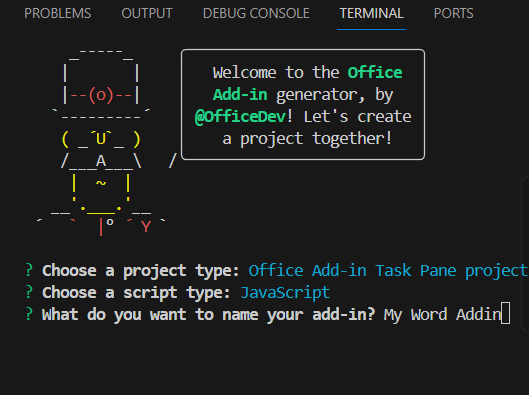
Finally, select the “word” option to target the word client application.
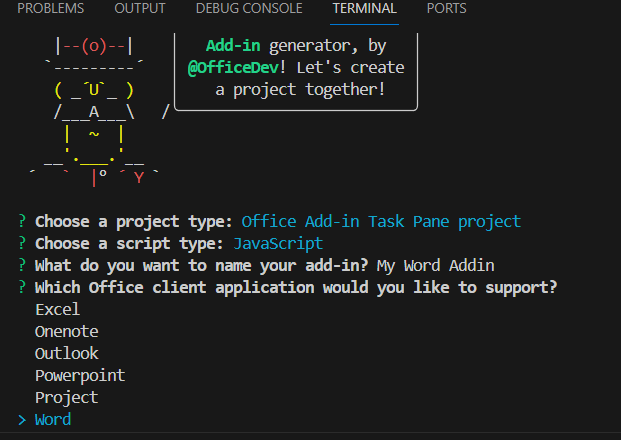
After your project is setup, you can right-click and open it in the integrated terminal.
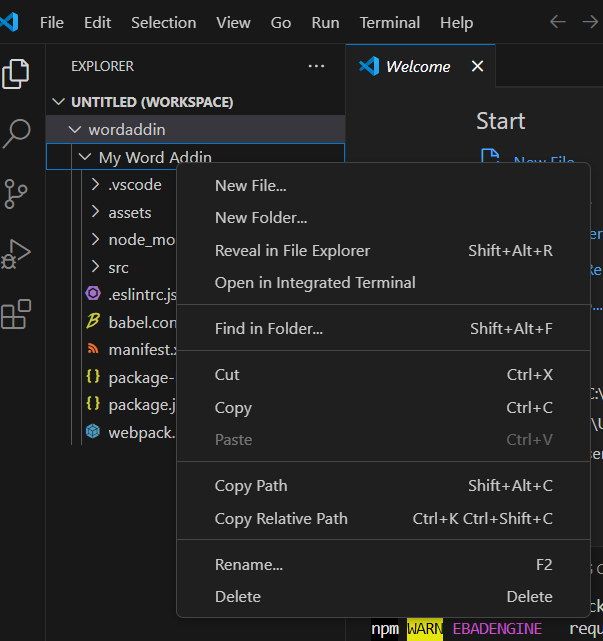
In the integrated terminal, you can run the following command to test your plugin.
npm startStep 3: Setup the Custom Frontend
For our Front end, we are going to use HTML and CSS. To start, let’s modify the HTML of our task pane add-in which is located in the “taskpane.html” file as shown below:
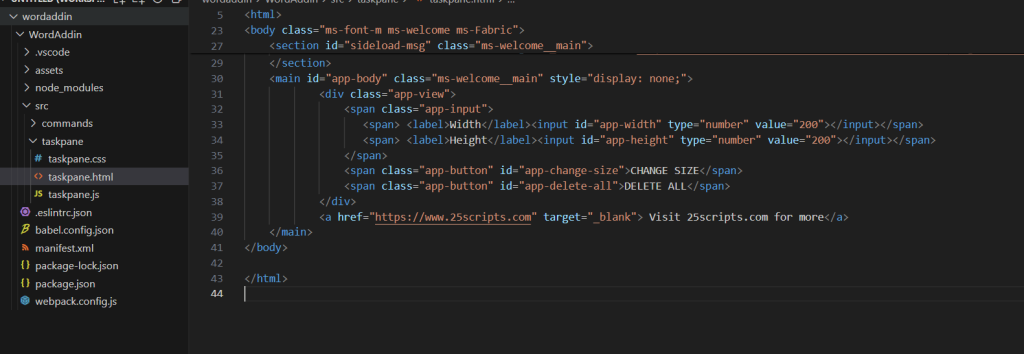
To modify our HTML, let’s modify the title, header and main tag to include our custom HTML as shown below. For this example, we are going to add some input boxes and buttons in the main tag. The input boxes will store the values of the width and height while the buttons will be used to execute the functions of the add-in via JavaScript.
<!DOCTYPE html>
<html>

<head>
    <meta charset="UTF-8" />
    <meta http-equiv="X-UA-Compatible" content="IE=Edge" />
    <meta name="viewport" content="width=device-width, initial-scale=1">
    <title>My Word Addin</title>

    <!-- Office JavaScript API -->
    <script type="text/javascript" src="https://appsforoffice.microsoft.com/lib/1.1/hosted/office.js"></script>

    <!-- For more information on Fluent UI, visit https://developer.microsoft.com/fluentui#/. -->
    <link rel="stylesheet" href="https://static2.sharepointonline.com/files/fabric/office-ui-fabric-core/11.0.0/css/fabric.min.css"/>

    <!-- Template styles -->
    <link href="taskpane.css" rel="stylesheet" type="text/css" />
</head>

<body class="ms-font-m ms-welcome ms-Fabric">
    <header class="ms-welcome__header ms-bgColor-neutralLighter">
        <span class="ms-font-su">My Word Addin</span>
    </header>
    <section id="sideload-msg" class="ms-welcome__main">
        <h2 class="ms-font-xl">Please <a target="_blank" href="https://learn.microsoft.com/office/dev/add-ins/testing/test-debug-office-add-ins#sideload-an-office-add-in-for-testing">sideload</a> your add-in to see app body.</h2>
    </section>
    <main id="app-body" class="ms-welcome__main" style="display: none;">
            <div class="app-view">
                <span class="app-input">
                   <span> <label>Width</label><input id="app-width" type="number" value="200"></input></span>
                   <span> <label>Height</label><input id="app-height" type="number" value="200"></input></span>
                </span>
                <span class="app-button" id="app-change-size">CHANGE SIZE</span>
                <span class="app-button" id="app-delete-all">DELETE ALL</span>
            </div>
            <a href="https://www.25scripts.com" target="_blank"> Visit 25scripts.com for more</a>
    </main>
</body>

</html>
In the “taskpane.css” file, let’s add some custom CSS to style our HTML code.